Although I just recently got my new laptop to play World of Warcraft, I decided to delete the game and deactivate my WoW account once and for all.
I’m still quite shocked regarding what is going on with my long-time favorite gaming studio Blizzard Entertainment and the accusations about discrimination of female employees and sexual harassment. I find it utterly hard to understand how such vile actions can happen in the 21st century in one of the world’s leading and successful gaming companies.
There have been more and more horrific details about how certain employees in the company treated their co-workers. For example, in addition to numerous inappropriate remarks and unwanted physical contacts, they organized so-called cube-crawls, in which employees first got drunk, then walked from one office cell to another and harassed co-workers.
I find such behavior totally unacceptable, and I’m not willing to support such a company anymore. If any of you, fellow WoW players, want to join me in this act of protest, please follow this step-by-step guide on how to uninstall WoW or WoW Classic from your PC or Mac.
How to Uninstall World of Warcraft Using the Battle.net App – Retail and Classic WoW
The easiest way to uninstall World of Warcraft from your PC or Mac is by using Battle.net App. Follow these few steps:
1. Run the Battle.net app

Whether you’re on a PC or Mac, you need first to run the Battle.net App.
2. Select World of Warcraft and Choose Game Version

Next, you select World of Warcraft game (1.) and from the drop-down menu (2.) choose which game version you want to uninstall.
3. Uninstall World of Warcraft
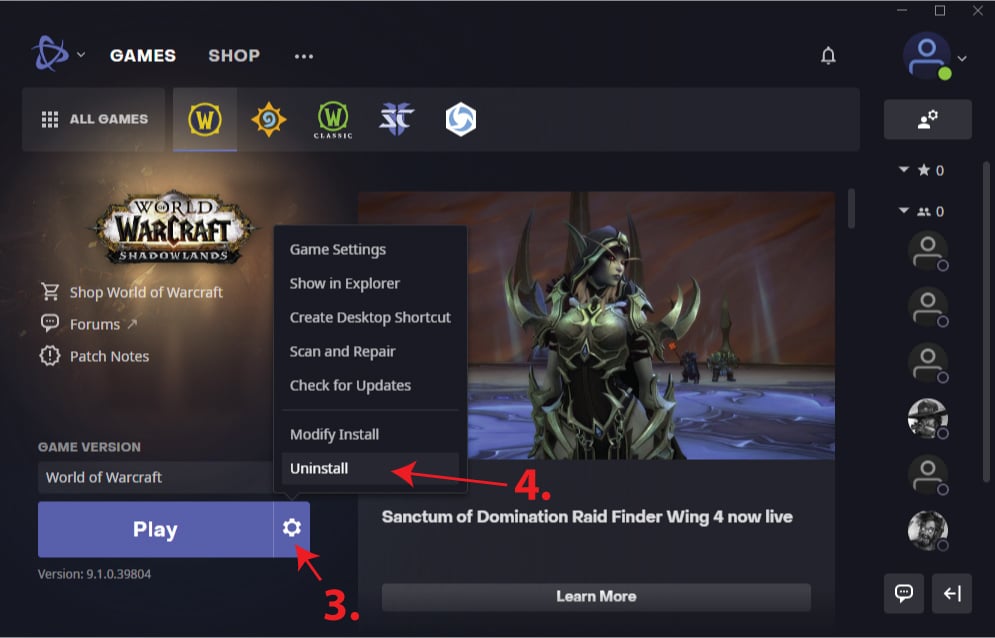
Click on the Options (3.) and click Uninstall (4.) and confirm it with “Yes, Uninstall” when prompted. If you have multiple versions like WoW Classic or The Burning Crusade Classic, just repeat steps 2 and 3 to uninstall them one by one.
4. (Optional) Uninstall Battle.net App on Windows (for Mac, skip to the next step…)

– Click on Start, start typing “add or remove programs” and run Add or remove programs app.
– Locate Battle.net, and click Uninstall.
5. (Optional) Uninstall Battle.net App on Mac
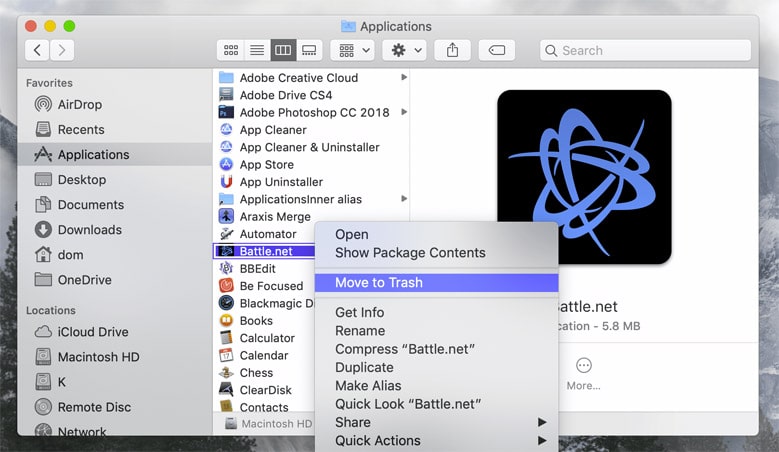
Navigate to your Applications folder, locate Battle.net, right-click on it, and Move to Trash.

? Here’s How to Find Out!")


